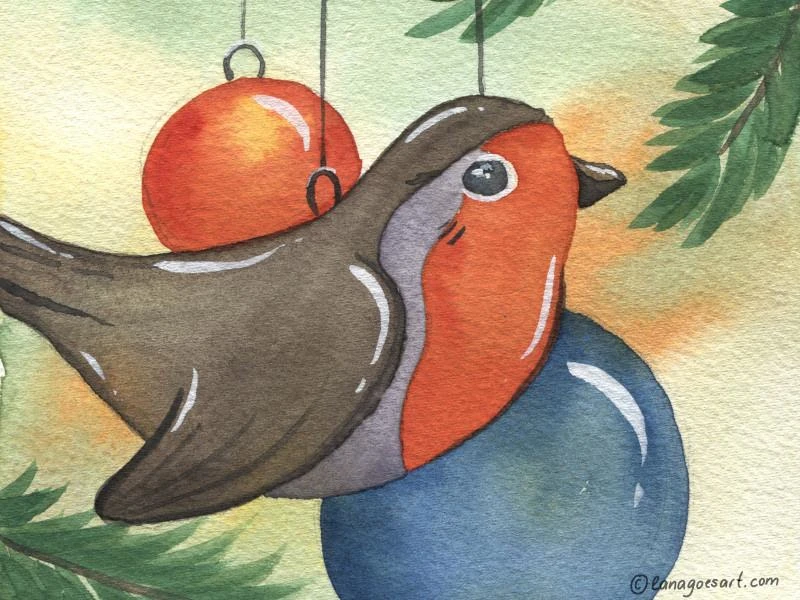
Are you in the mood for some Christmas painting? Then you might have fun with this beginner friendly tutorial.
Chapters
- A List of My Supplies
- Video Tutorial
- 1. Sketch Out The Painting
- 2. Paint The Background Wet-In-Wet
- 3. Start With The Bird
- 4. Paint The Branches
- 5. Finally We’ll Give The Bird More Color
- 6. Time For The Second Christmas Ornament
- 7. Complete The Robin Now
- 8. Final Details In Black
- 9. Add Some Love and Highlights
Inspirations strikes everywhere. For this illustration I just had to go grocery shopping. Just in front of the farm shop I saw this tiny robin jumping around on the palettes. Luckily it waited long enough for me to get a few photos until it flew away.
From this little meeting this cute Christmas illustration grew as well as the tutorial for it. If you’re inspired as well, you’re welcome to paint with me!
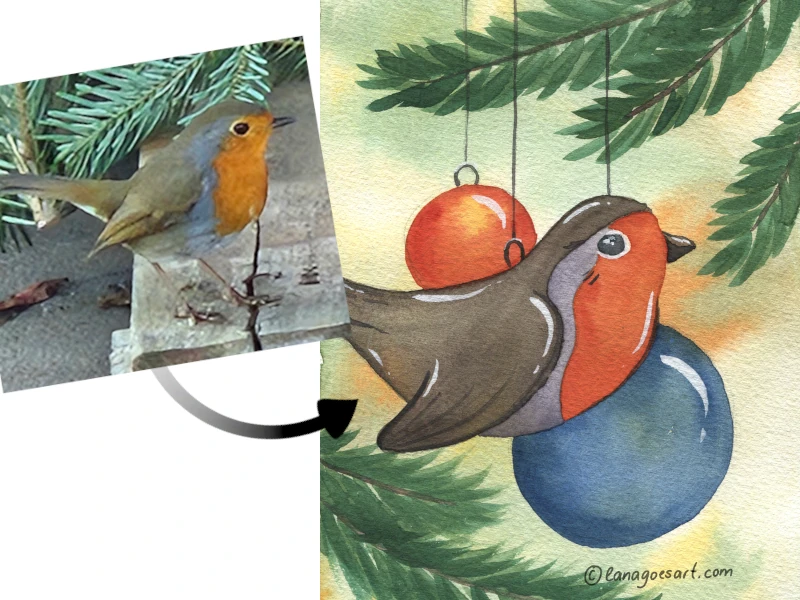
Photo to illustration. With a little creativity a real bird can turn into a Christmas ornament - perfect for Christmas paintings and cards.
A List of My Supplies
I have consciously chosen to use only minimal supplies for this and other tutorials on this blog. Especially for the beginner ones it’s the same palette of colors. That way it’s easy to learn mixing colors and still achieve anything you need for your paintings. For those new to the hobby, the shopping list will be short. But feel free to use whatever paints and supplies you have on hand!
If you have questions and want to read more about the quality of paper, here is an article that might help you.
- watercolors (I’m using Schmincke Akademie)
- gouache (Titanium Weiß)
- watercolor paper (Fabriano Artistico)
- brushes - variety of sizes (Da Vinci Casaneo and I Love Art von Gerstaecker)
- pencil and eraser
Affiliate links to Amazon were used where possible to help support the site and database. I will receive a small commission when these are used for purchases at no extra cost to you. Thank you!
Video Tutorial
On YouTube you can watch the full tutorial including all the steps, if you need more visualization on how to apply colors or if any of the steps stays unclear.
1. Sketch Out The Painting
Prepare your paper and get all the supplies you’ll need. Then sketch out the painting using the pencil.
Here is the lineart that you can use to draw yours.
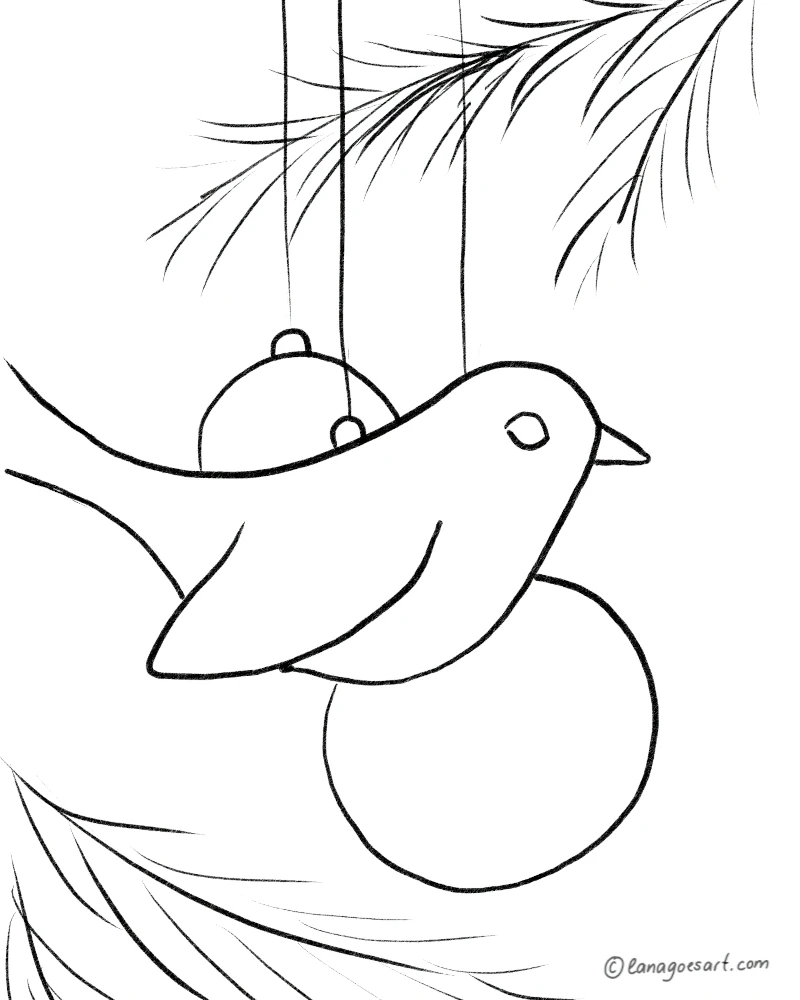
Lineart that you can use to sketch out your Christmas illustration.
2. Paint The Background Wet-In-Wet
Prewet the paper before applying paint, so you get a nice softness. Mix a warm yellow and burnt Sienna to a slightly muted orange. Then add first some warm yellow to the paper and dab the orange mix into some spots around the bird ornament.
In case the water and paint start to puddle, you can soak them up with a paper towel. That will also avoid cauliflowering during the drying process.
To hint at the branches in the background mix a green from the palette with a little bit of yellow Ochre and add the color in short lines along the branches. The paint will spread and flow. This simulates more branches in the background.
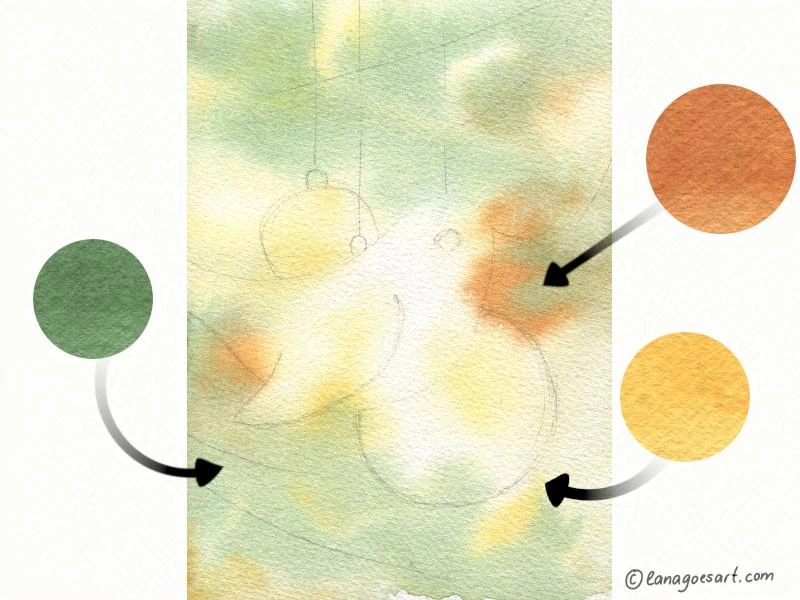
This is how you can paint the background for the Christmas illustration.
In the following steps we will add details to the painting. Let it dry first, so the details won’t bleed when we apply the paint.
3. Start With The Bird
Cover the face and breast area of the bird first with Indian yellow, or same warm yellow as in the previous step, and add then Cadmium Red Hue (or a different warm yellow) in the border areas. The paint will spread and will look even warmer, almost orange. This is wonderful and will add interest to these areas of the painting.
Repeat this with the ornament behind the bird.
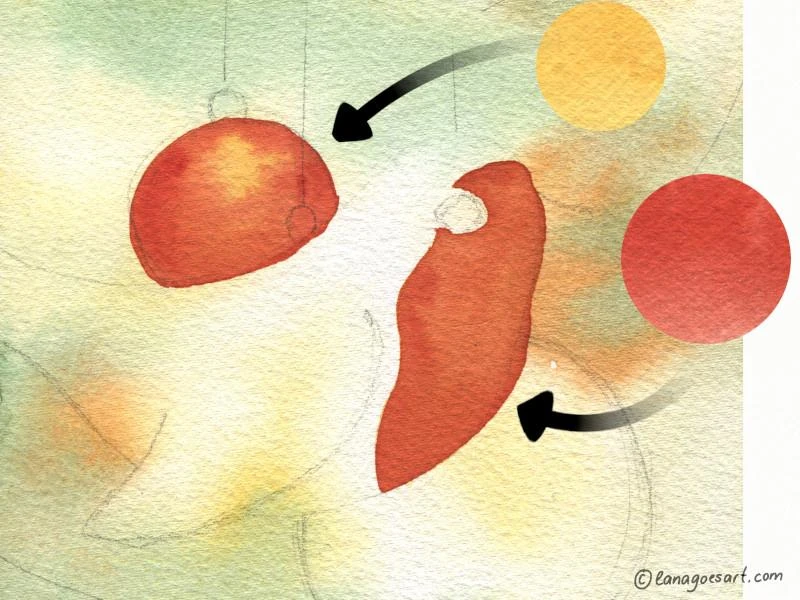
The yellow provides more warmth to the red and makes it less monotone.
4. Paint The Branches
Draw a line using burnt Umber along the stem of the branches. Use the green mix from before in a more intense consistency to paint the needles in short lines.
After painting the first layer of needles you can add some blue to your mix and paint another layer needles on top for more depth and variation.
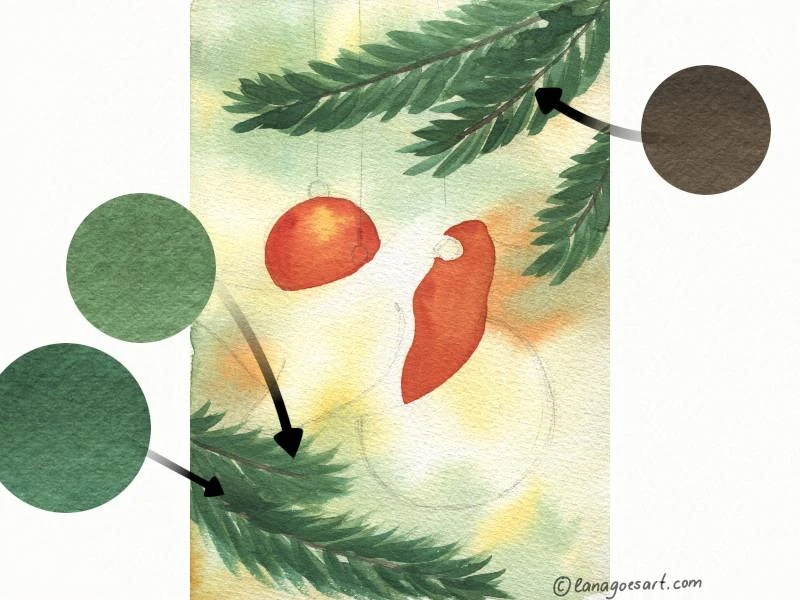
The two greens give the needles on the branches more depth.
5. Finally We’ll Give The Bird More Color
Mix burnt Umber with a little bit of Yellow Ochre for a little warmer brown and cover the back and wing of the bird with the mix. Add it to the beak too.
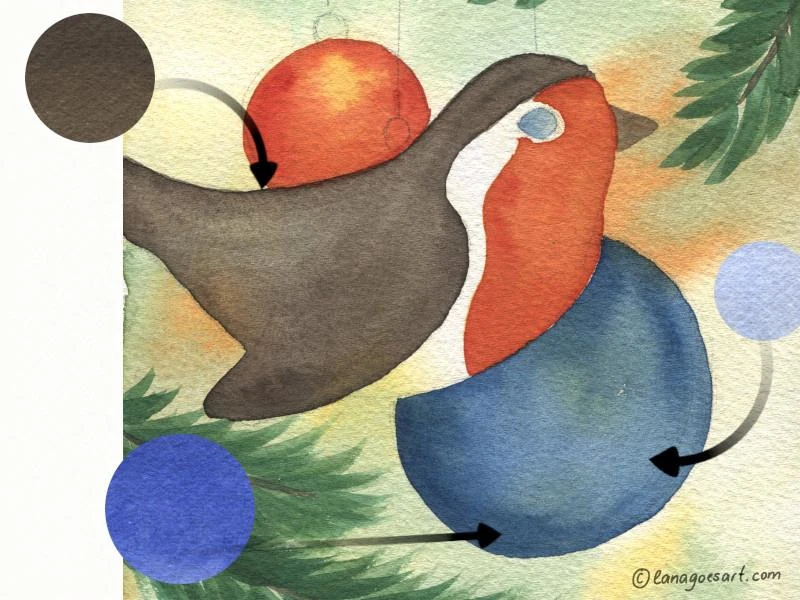
The steps 5 and 6 of the painting tutorial show how you’ll get more color to the bird and paint the second tree ornament too.
6. Time For The Second Christmas Ornament
Fill the ornament first with a watery mix of Phthalo Blue and add then a more concentrated paint to the outer edges so it runs to the center of the ornament.
You can use the same watery blue to fill in the eyes too.
Let the paint dry for a little bit before you go to the next step so the paint won’t flow into each other.
7. Complete The Robin Now
Mix Ultramarine and burnt Sienna to a muted purple color, that looks a bit greyish and cover the area between the red and brown.
Let this area dry for a few minutes again to add details to this part. You can start with the next step in other areas though!
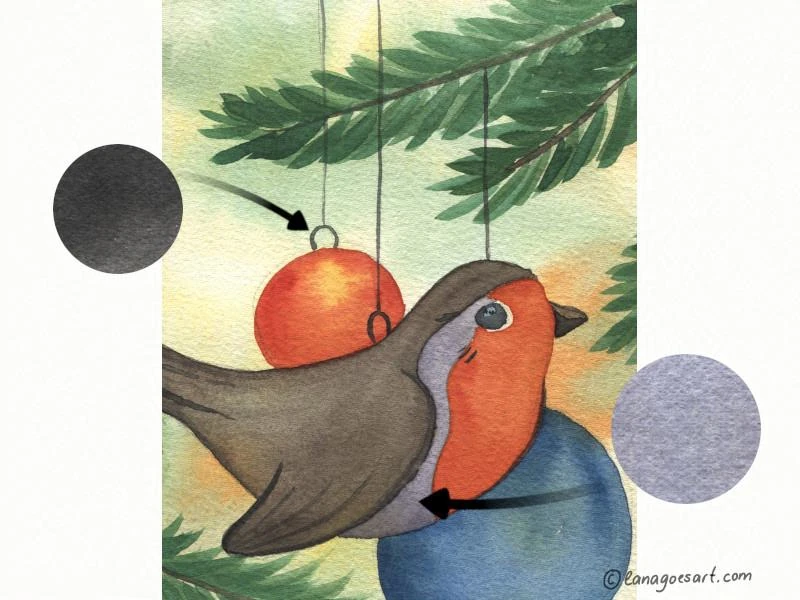
Steps 7 and 8 will complete the bird with details and all.
8. Final Details In Black
Use the black from your palette to add details and draw lines for the thread and loops of the ornaments. Add additional details to the bird at the wing, beak and tail. Paint the eye too, but leave some blue shining through and leave some space for the highlight.
9. Add Some Love and Highlights
In the final step you can add highlights to the ornaments and the robin too. Now it looks nice and shiny reflecting lights and just ready for Christmas.
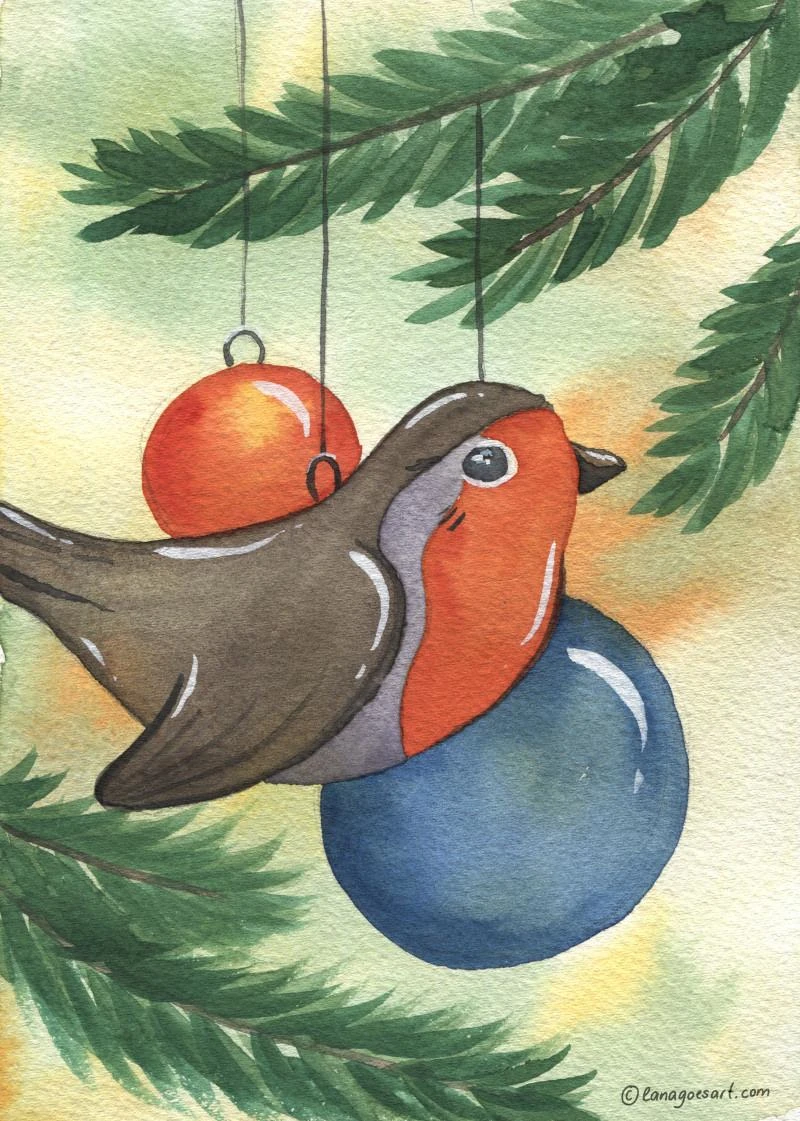
The final painting of the robin ornament.
If you enjoyed painting with me, look into the other free tutorials. Share your results with me on Discord, Mastodon or Bluesky. Maybe you’ll find more ideas for more creative and cozy hours.
Yours Lana


