
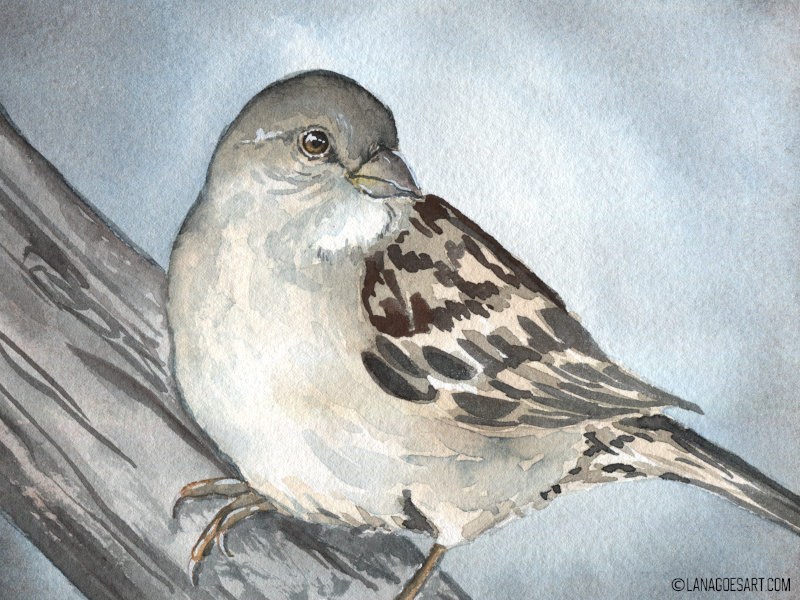
As the days are getting cooler, we need a little more cute and cuddly things in our lives. So today we’re going to paint a cute and fluffy sparrow together.
So grab your supplies and let’s have some nice and cozy time painting.
Chapters
- Reference
- List of Supplies
- 1. Sketch First
- 2. Paint the Background
- 3. First Layer of the Bird
- 4. Apply the First Layer on the Branch
- 5. Eye, Beak and Feet
- 6. Add a Second Layer to the Feathers
- 7. Paint the Details
- 8. Add the Highlights
Reference
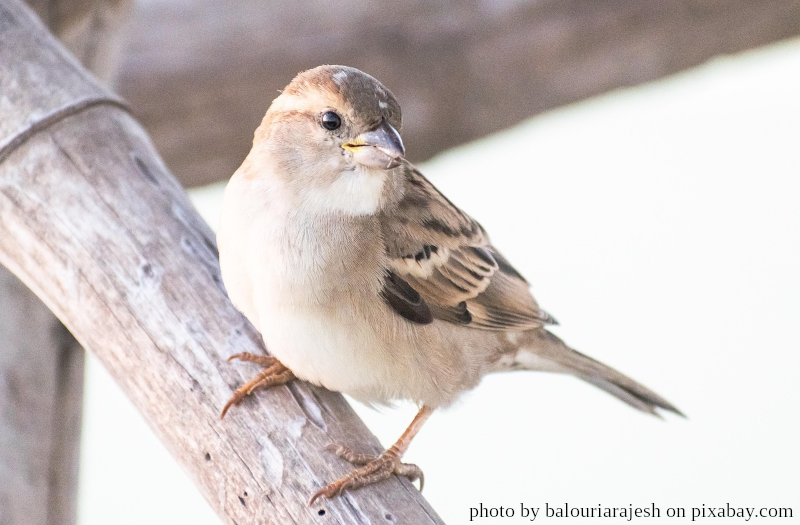
Reference photo taken from pixabay.
For reference I chose this photo by balouriarajesh on pixabay.com. The pose of the bird appealed to me, but I will shift the colors a little to make it look a little more like what I imagine.
List of Supplies
- watercolor paper (Centenaire)
- watercolors (Schmincke Akademie)
- various brushes (I love art brushes)
- pencil & eraser
- white Gouache (or ink, gel pen etc) Schmincke Horadam Titanium White
Feel free to use the supplies you already own! I choose basic supplies for the tutorials. The color selection will be easily found in any other set of colors. What matters most is the fun while painting and improving your skills rather than purchasing more stuff.
If you’re curious to read about what to look out for when buying watercolor paper or what you need to start I have some nice articles for you on this blog.
Affiliate links to Amazon were used where possible to help support the site and database. I will receive a small commission when these are used for purchases at no extra cost to you. Thank you!
Video Tutorial
1. Sketch First
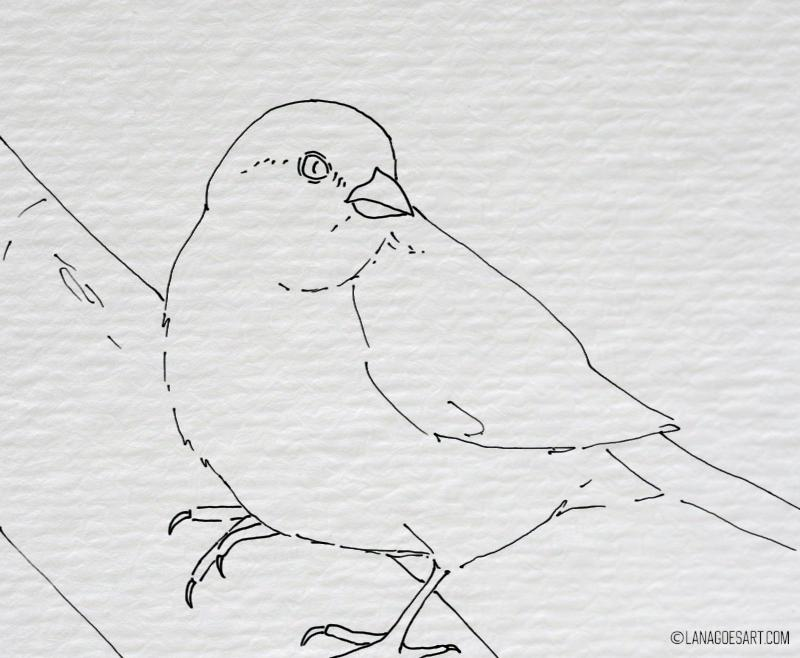
Sketch the sparrow onto your piece of paper using a pencil. You can soften the lines afterwards using a kneaded eraser, so you can still see them. That way they won’t show in the finished painting. Feel free to use the line art as a reference for your sketch - you can even trace it if you want!
2. Paint the Background
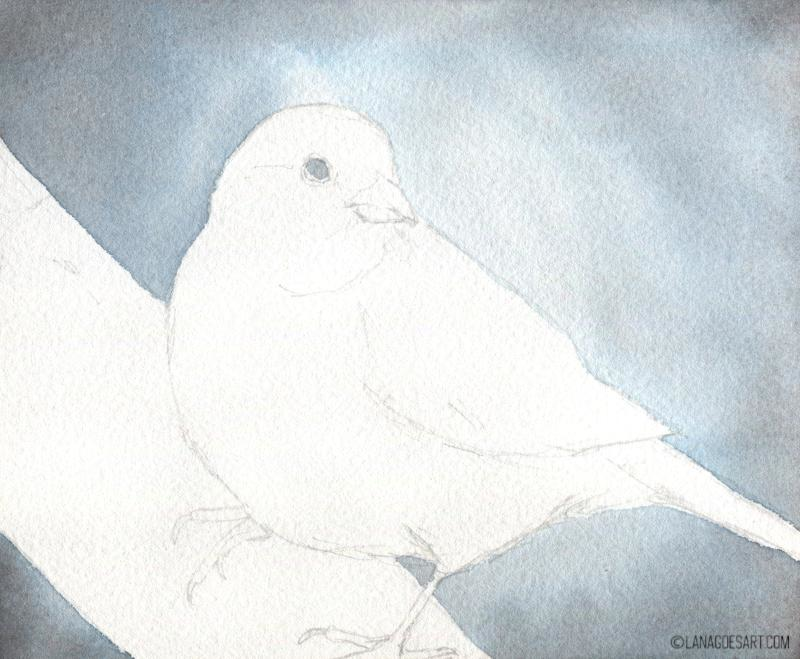
Mix Phthalo Blue and English Red (or burnt Sienna) into a nice deep grayish turquoise and apply is cautiously in the background. Wash out your brush once you come towards the center, so it stays lighter than the outer edges. This will create an almost vignette look on the finished painting. Leave the sparrow itself and the branch free. Add a little dot of the background color into the eye for depth.
3. First Layer of the Bird
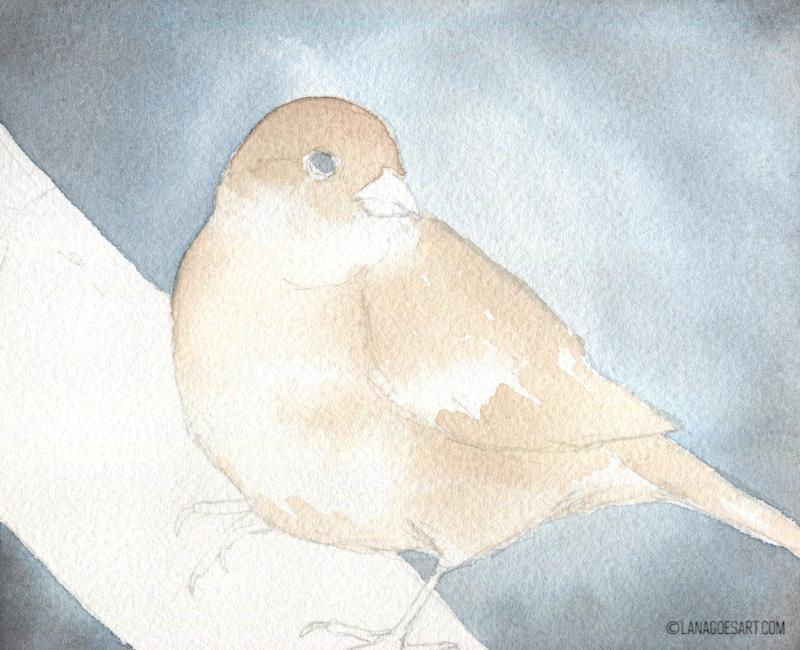
Mix some Yellow Ochre, English Red and a little bit of burnt Umber into a warm neutral brown, water it down and apply it on the birds face, head and body. Leave some areas white and light for highlights and pay attention to the edges - keep them soft!
Tip: You can soften the edges by using a clean damp brush and taking way moisture on the edge between the applied paint and dry area. If your paint was too wet, it will flow back into the edge you softened. Just repeat the process until the edge dries nice and soft with a smooth blend into the white.
4. Apply the First Layer on the Branch
Mix some more English Red to the mix you used for the background, so it’s a rather gray color. Apply it lightly over the branch leaving out the feet of the bird.
5. Eye, Beak and Feet
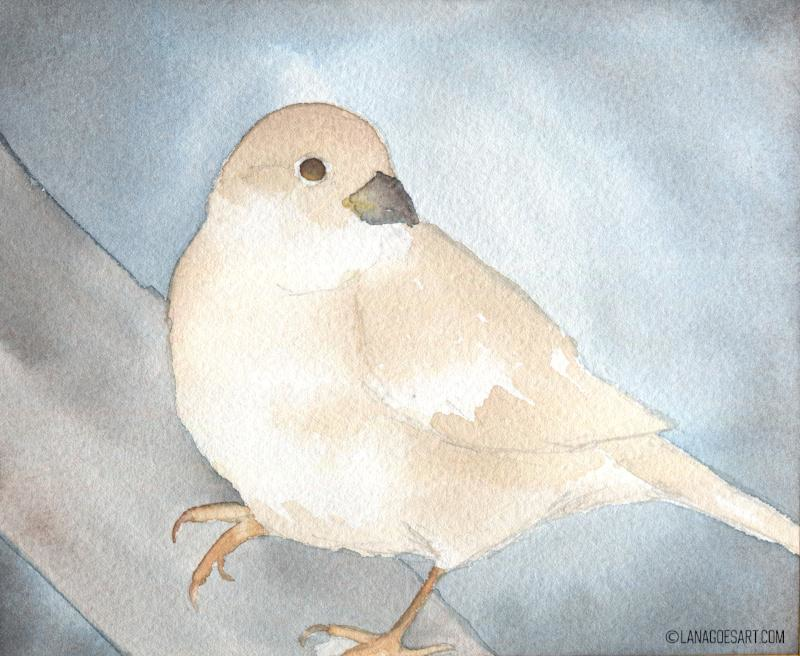
For the eye use Yellow Ochre on the bottom part of the eye and add some English Red and burnt Umber to the top part of the iris. Let the paint flow into each other.
While the eye dries, paint the beak. Use Yellow Ochre again around the edges and add the gray from the branch to the top and lower beak. Let the paints touch by moving them carefully using a clean brush.
For the legs mix Yellow Ochre and English Red into an orange and apply it over the legs of the bird.
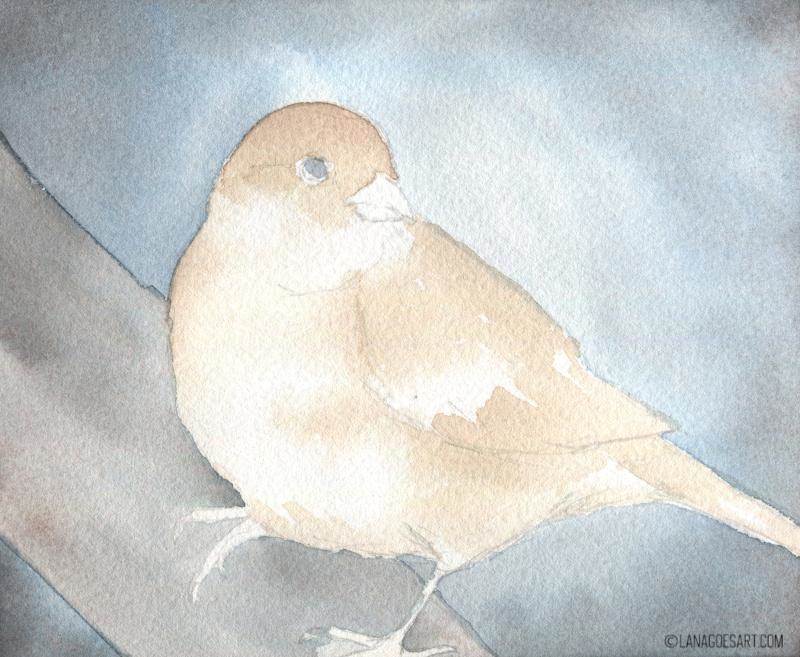
6. Add a Second Layer to the Feathers

Mix burnt Umber with a little Phthalo Blue to neutralize it slightly and add a layer of the color to the head of the bird as well as some slight shadow underneath the wing and feathers underneath the belly and the butt. Butts need to be fluffy, you know. It’s a rule. Add also some slightly defined strokes to the wing using the same mix. Shade the legs slightly using the mix as well.
7. Paint the Details
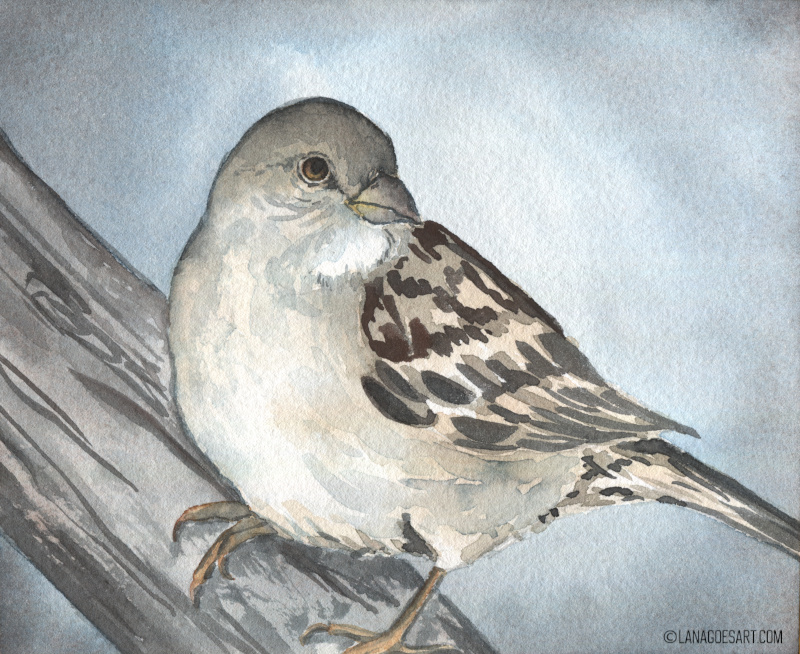
This the the famous step, where I paint just all the details at once using one mix. In this case the mix is the same we used for the sky plus extra English Red, so the color is a nice rich brown. It separates in a light blue, which I used for some shading too.
Using this mix add somewhat of a soft outline and watered down shadows on the belly and head area. With a saturated mix add “eye liner” and a pupil, some detail on the beak and the wings as well as the tail. The lines are mostly done very loosely. Add shadows to the feet and detail to the branch too.
I really enjoy these bluish hues in these mixes warmed up by the English Red. After the paint has dried go to the last step of the painting.
8. Add the Highlights
With white gouache add a highlight to the eye and the beak. Add light areas wherever you feel you lost them during the painting process - such as the claws too.
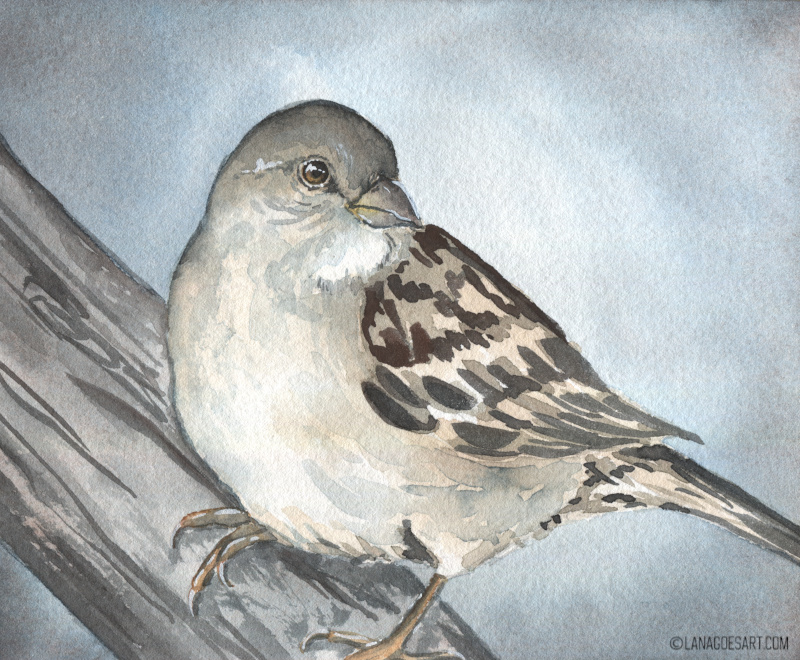
You’re done now!
I personally enjoyed painting this sparrow in watercolor using a limited palette that almost feels vintage in its mixes. If you enjoyed painting with me, feel free to look into other tutorials on this blog. It’s a collection by now and I’m glad to share many more with you. In case you want to support me, feel free to tip me on coffee or join my patreon to support the watercolor database. Thank you!
Have a great day I hope to paint with you soon again!
Lana