
Castles at night, nothing is more tempting, scary and so full of expectations. They also provide a great shape to play and use - especially when partially enlightened. In this tutorial we will practice painting light in the middle of darkness.
Chapters
- Light Within the Dark
- The Reference
- A List of My Supplies
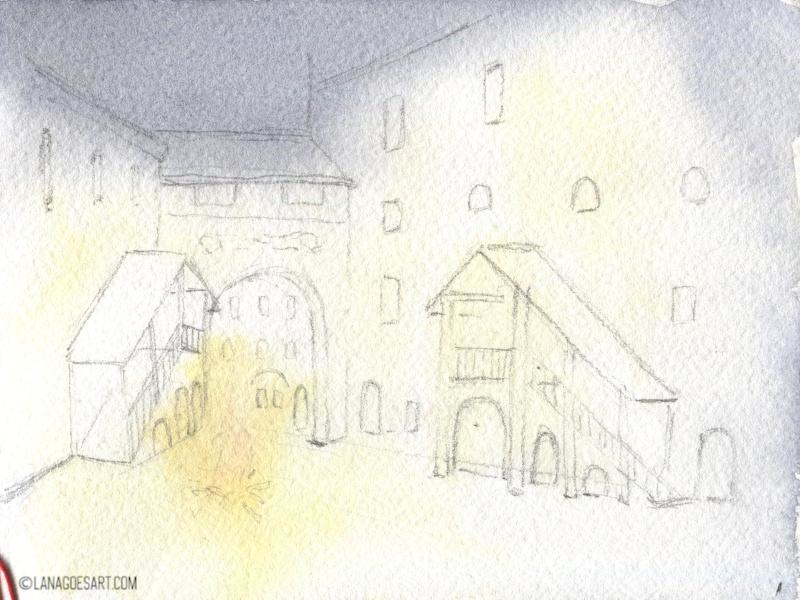
- 1. Drawing
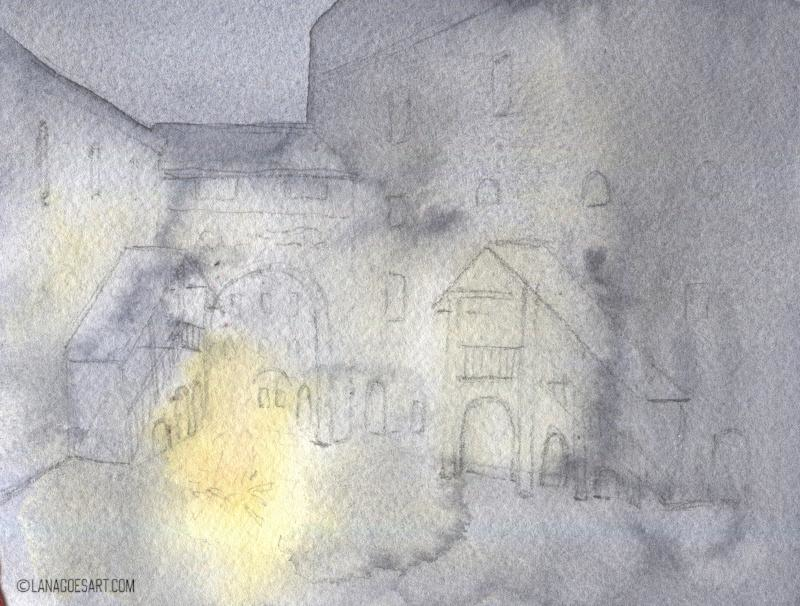
- 2. First Wash
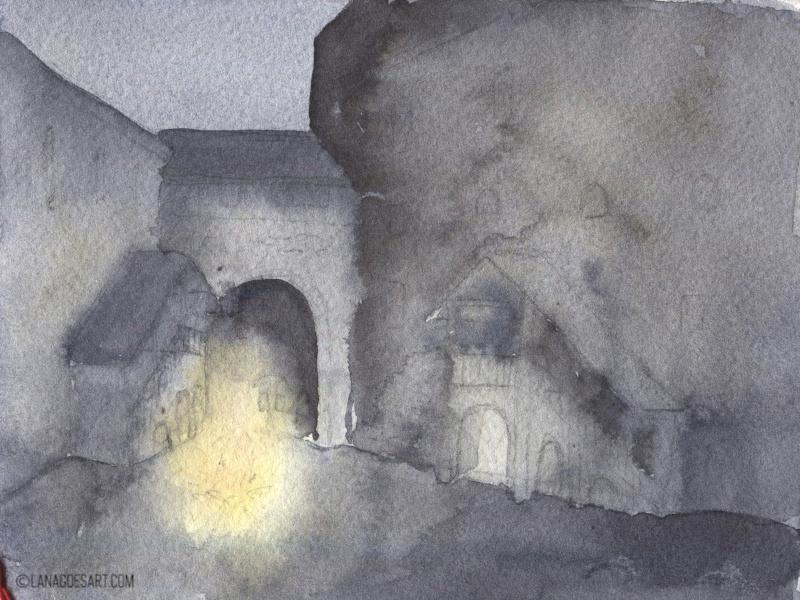
- 3. Setting Up Lights And Shadows
- 4. Defining Shapes Wet In Wet
- 5. A Hint of a Shadow
- 6. Add the Details
- 7. Add the Darkest Darks
- Final thoughts
Painting a bright light source in the middle of darkness can be tricky in watercolor. Especially when you need to find out how to do it. The idea for this tutorial cam actually from reddit. There was a question on one of the watercolor subreddits with a screenshot of a game. A castle at night with a bon fire in the middle and a person walking away from it. And the question “How do I paint that?”

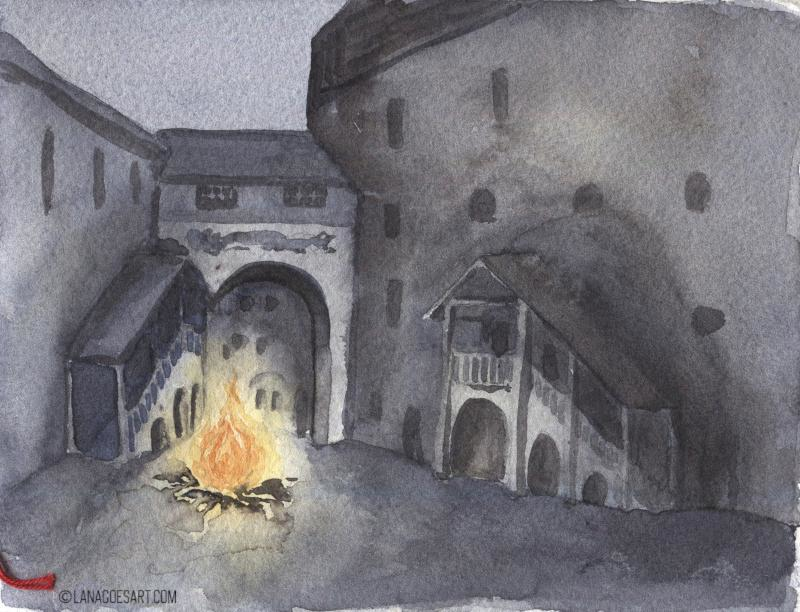
A sketch that resulted from a random reddit question.
I was intrigued, immediately! So I grabbed a random sketchbook of mine and painted a very quick sketch on how I would capture that scene. Of course there was lots of room for details and accuracy. But it felt simple enough. Deconstructing something and being able to capture the scene on paper.
But still I felt the concept of warm light sources in midst of cool darkness is a tricky one. So here we are, to make it a less scary matter.
Light Within the Dark
Painting light within very dark areas can be a very tricky matter. First of all, we can only paint what we see. Light gives us information which we can use to then turn into an image. Outside of light, when there is complete darkness, we don’t have any information we can use to actually show something.
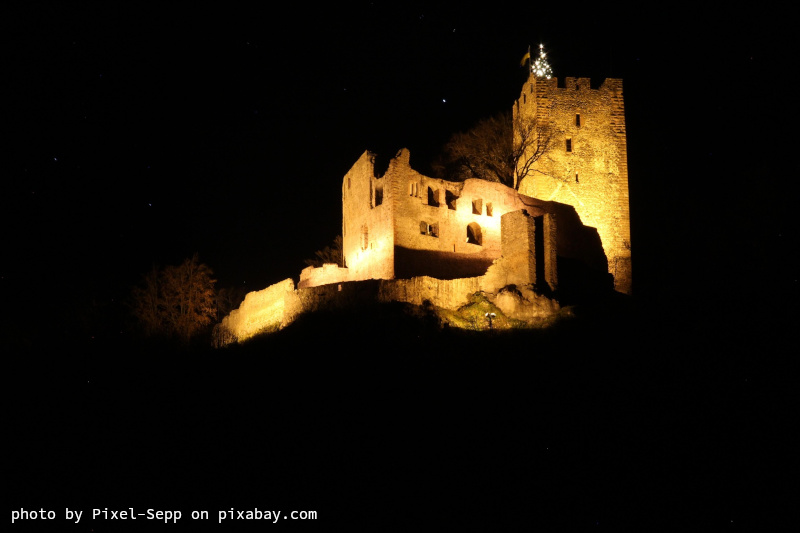
Castle lit up for visibility at night.
This example by Pixel-Sepp on pixabay.com shows it well. Where the walls of the castle are lit at night, we have plenty of information, we see it and it’s something we can paint. Outside of it, the shadowy hill, the night sky, we can only assume. There is not enough that shows,so we can only guess whether there’s nothing around it, hills, mountains or a thick forest. We could guess, but we can’t see it.
This photo also shows nicely how the shadows look which are thrown by the lights. The area around the lights has very sharp edged shadows, the middle area is softer. But the outlines of the castle look sharp before the background. It’s really worth noting, because it can help you depict light better in your other projects.
This is how a lightened castle looks from afar.
If we’re closer to the light sources, the picture is slightly different.
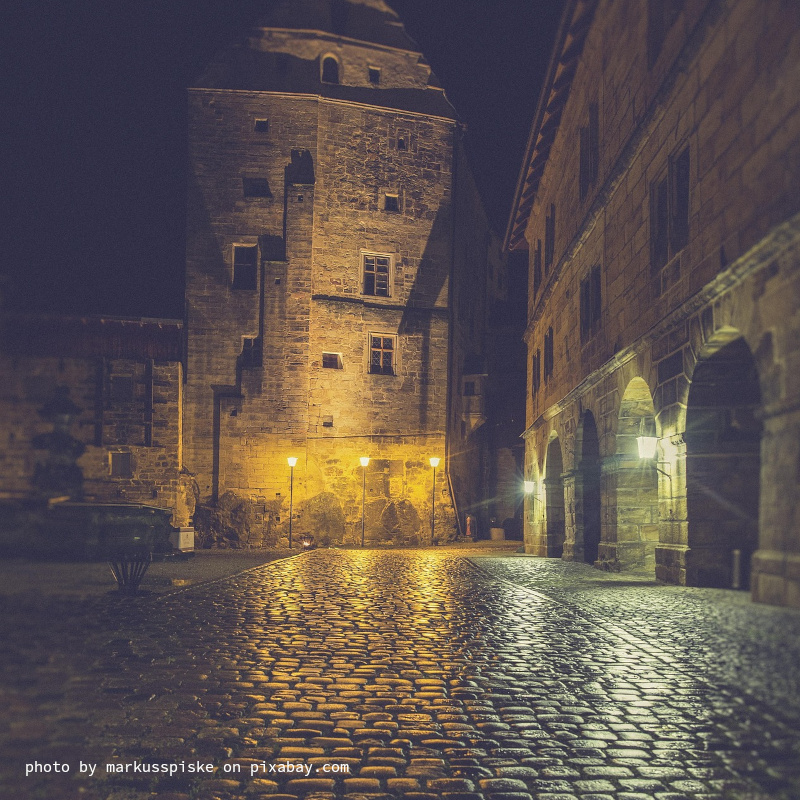
Castle at night - shows how light sources work and throw shadows at walls and stones.
Here in the photo by markusspiske on pixabay.com we can see much more. Still the outlines of the castle and walls look very sharp against the black background. The lights are bright and reflect off the smooth cobblestones, showing their pattern very clearly. On the wall we again can see a mix of shadows with sharp and soft edges. Lots of areas, that the light can reach.
If we look at the light sources clearer, we can see that they themselves don’t have color inside. The surrounding light might shine warm and yellow. The lights themselves are white. So when painting these, we’d use a white center and paint a yellow halo around it, probably wet in wet for soft edges and then dark cool colors around. As you can practice in the tutorial today.
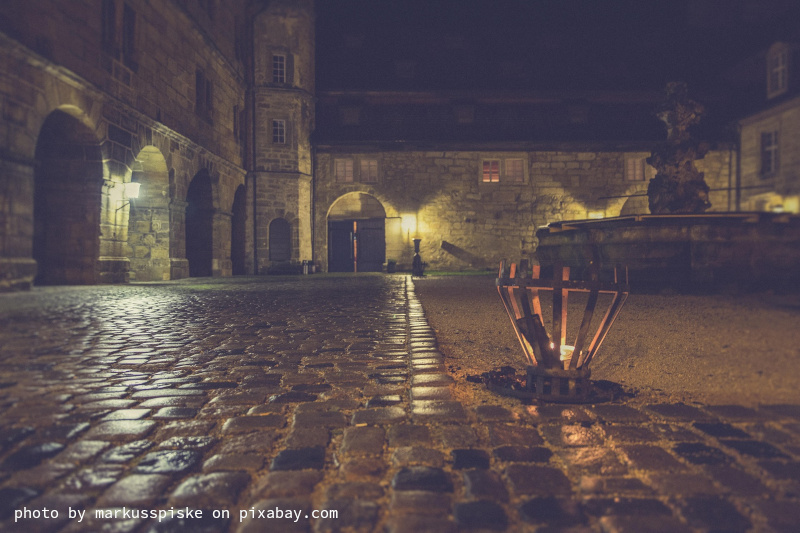
Another great image of light sources at night.
You can observe the same effects in this one again by markusspiske on pixabay.com.
It’s a big misconception that the light sources have a dot of color in the center, because the light they throw has color. Indeed light, just as the very dark, has no information - but on the other spectrum of value. It is white, there is no detail, nothing. It actually can overpower some of the detail, as you can see in the light on the wall in the middle of the photo. The wall shows less texture right next to the light. And it becomes more gradually the further away we are from the direct light source.
I feel when you have this in mind when painting any lights, not only today’s tutorial, you will succeed in depicting light in a very natural and convincing way. This tutorial can help you to practice doing exactly that, painting light and shadow.
Video Tutorial
The Reference
In addition to the references of lights within dark castles, I chose this one for the actual painting. I like how it’s built and all the details we can add. For me it looks like possibilities.
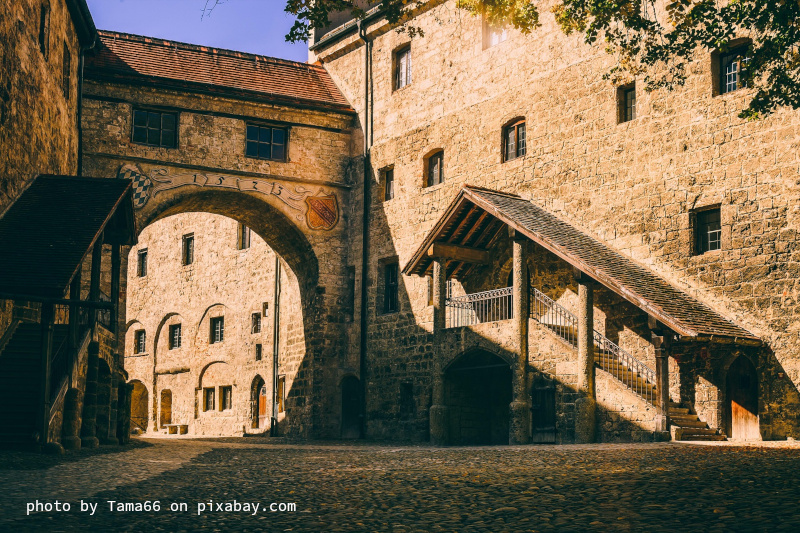
Reference for today's painting tutorial.
For a guide on how to draw this, scroll ahead. I just want to share with you the inspiration for today’s tutorial, which is this photograph by Tama66 on pixabay.com.
A List of My Supplies
- watercolor set (I use Schmincke Akademie)
- watercolor paper (I use Centenaire)
- watercolor brushes of various sizes
- pencil and eraser
As always feel free to use what you have. But I have a guide on watercolor paper, if you like to read about why I prefer cotton paper to paint on. There is also a guide which supplies you truly need to start with watercolors. I want you to know, that you don’t need a certain brand, but can choose whatever is available and affordable to you. Depending on where you live, this can change drastically. It’s why I don’t suggest any brands in particular. Quality matters more to me.
Affiliate links to Amazon were used where possible to help support the site and database. I will receive a small commission when these are used for purchases at no extra cost to you. Thank you!
1. Drawing
The drawing for this painting is a bit trickier than in the previous tutorials. But step by step you can do it too. I’ve prepared some guides for you, that you can follow.
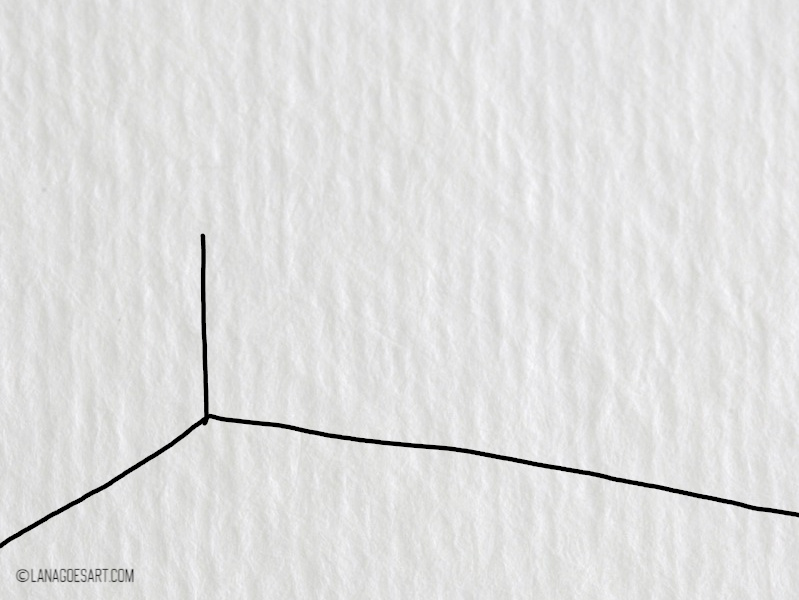
Draw the guide lines first, which will help you to see where to place the buildings and help your orientation in general.
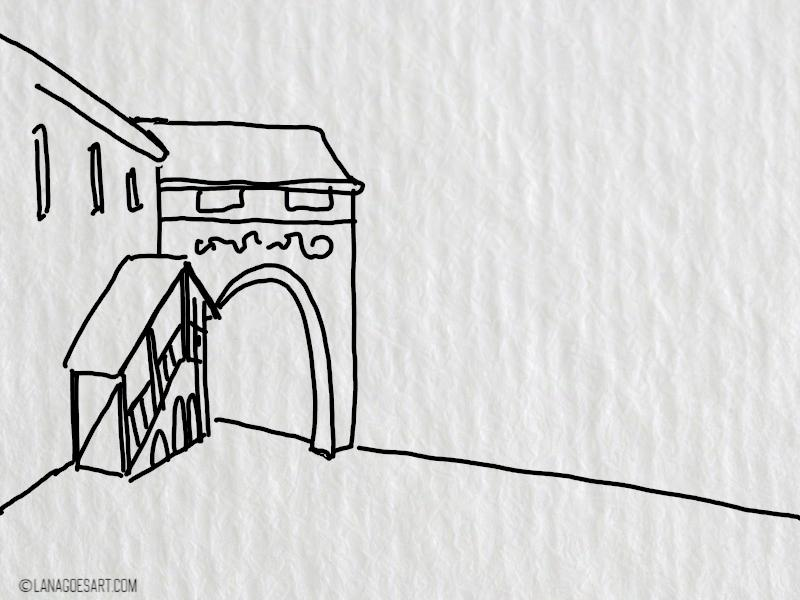
Start from there and draw in the first buildings. Remember that all the vertical lines are indeed parallel to each other and go straight up.
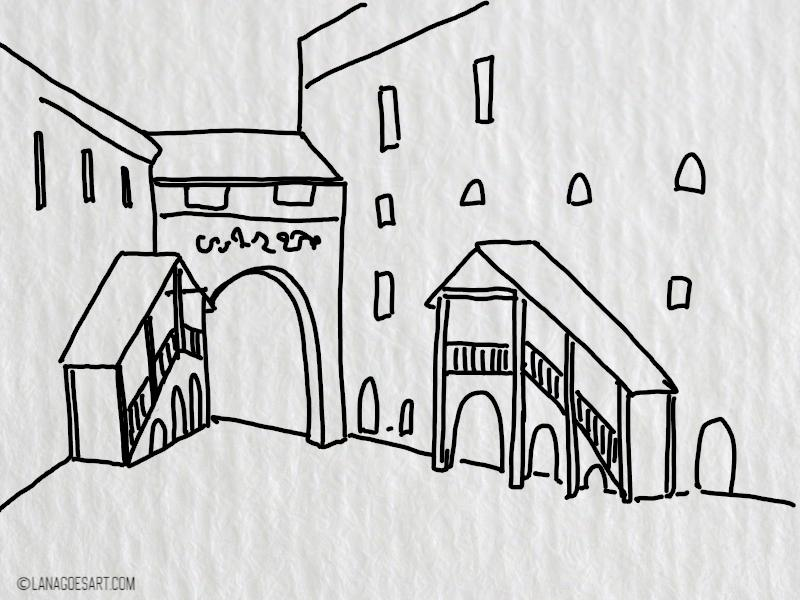
You can place the windows loosely on the big building, they’ll be only seen as shadow areas later on. If you like, you can leave those out. The stairs though will be visible well in the finished piece.
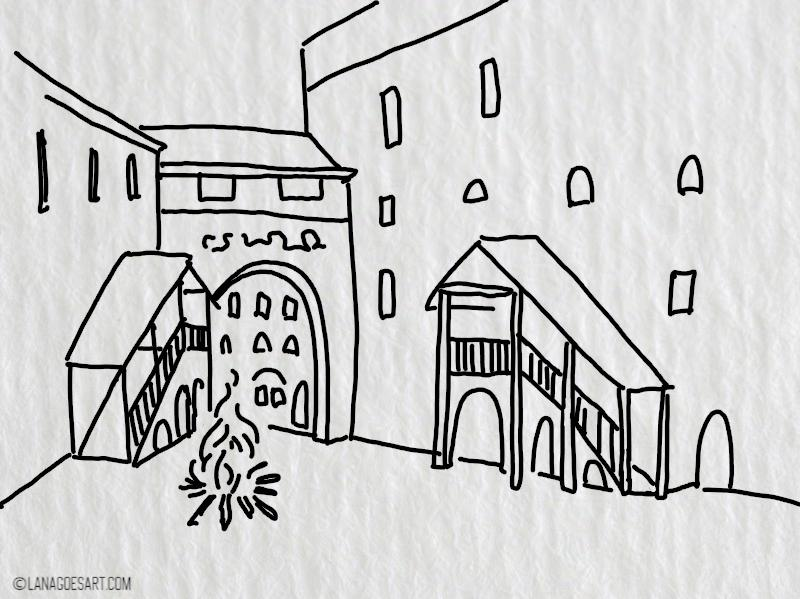
Place the details of the buildings in the back and the fire, which will cover some of it up.
Make sure to erase details around the fire, because it will hide them.
2. First Wash
The background wash for this needs to be well planned as it won’t consist of one color only.
Prewet your paper fully and drop a little Lemon Yellow in the fire area, you can add a little bit or Cadmium Red Hue or any other warm red or orange in the mix for some warmth. Paint also loosely some areas of the walls in yellow, as they are enlightened by the fire and will have a warmer hue.
Mix Ultramarine and burnt Umber to a very muted dark grey and paint the sky area with it. It’s ok if the paint flows and overlaps. You can drag some of it into the right area of the painting.
Let the paper dry before you go on, if you like to keep more control. You can carefully paint on before, but be prepare to keep an eye on your paint and fix on the go.
3. Setting Up Lights And Shadows
Prepare more of the mix of Ultramarine and burnt Umber, it’s the main color we’re going to use from now on.
Tip: I prefer to use Ultramarine and burnt Umber instead of plain black paint, because it will granulate and separate on paper, creating interesting effects. Even on plain areas there will be some color variation from the mix, which will help to look interesting in the final painting.
With a darker mix start at the top defining the hard line of the roof against the sky. Going down add some water to not cover up the light areas completely and try to define first dark areas and separation between the houses.
Make sure not to cover up the light source, the fire while doing this and maintain a soft edge towards it.
If you’re not sure how to create soft edges, this frog tutorial is perfect to practice them. Soft edges are needed to create smooth blends and color transitions in many cases and it’s a basic technique in watercolor.
4. Defining Shapes Wet In Wet
With a more intense mix you can wait until some of the areas have slightly dried. You can then define some of the shapes and thrown shadows of the painting. On slightly damp paper the paints won’t move to much and it will be easier to maintain control.
You can also paint the dark background in the arc, as this is an area that stayed mostly dry during the previous step and won’t bleed.
5. A Hint of a Shadow
In the theory section we established, that light sources will throw soft shadows in the middle distance. This we have here a lot in the area of the stairs especially.
To paint those use a less intense mix of the shadow color (mix of Ultramarine and burnt Umber) and paint some of the darker areas around the fire. Like the dents underneath the stairs, the banner and windows above the arc. Use a more intense mix to darken up the area underneath the stair roofs and some throw shadows behind the stairs.
You can add first definitions on the buildings too. Don’t worry to paint too much though. In the darkness, most details are not visible.
Use some more Lemon Yellow and Cadmium Red Hue in a soft orange to warm yellow mix to paint some loose lines in the fire to simulate the movement of it.
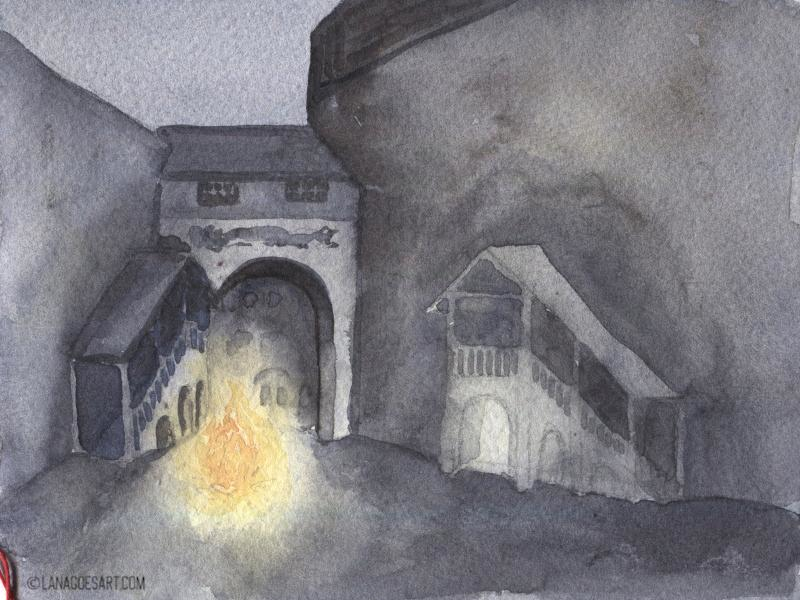
6. Add the Details
In a painting like this, details are rare… but we can define whatever is lighted by the fire.
With an intense mix of Ultramarine and burnt Umber you can define further the staircases, darken up the windows and the arc. Add logs to the fire, which will look almost black.
Add a little more definition to the fire too with more of the orange mix you used before and just few lines.
7. Add the Darkest Darks
Even a painting made at night needs some darkest darks and these we will add now.
Mix a very intense mix of Ultramarine and burnt Umber, you can also use black for this step, if you want to.
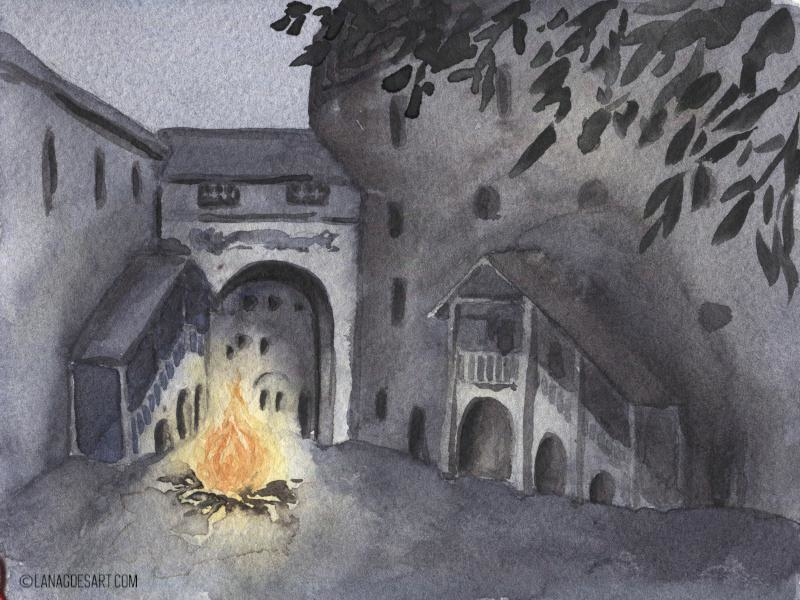
We will darken up just a few areas in this step like the windows. And paint the leaves of the tree in the foreground. I enjoyed how they framed picture in the reference photo and wanted to add some loose leaves here too. They would cover some of the light from the fire and look black to the viewer looking at the scene.
I painted the leaves in a very loose way and you can do that too! Be brave!
Final thoughts
I feel this tutorial is painted quicker than the theory for it is explained. But I hope you enjoyed this little exercise and painting with me. As always it’s just a glimpse at what is possible with watercolors and is just a way to practice techniques with me.
If you enjoyed it, you’re welcome to paint more tutorials with me, all covering different aspects and techniques of watercolor and join me on twitch.tv for nerdy art streams, tutorials and color studies.
Have a wonderful day and thanks for painting with me!
Lana